Using an Arduino Uno as a Spotify Controller on Mac
Hardware:
Arduino Uno
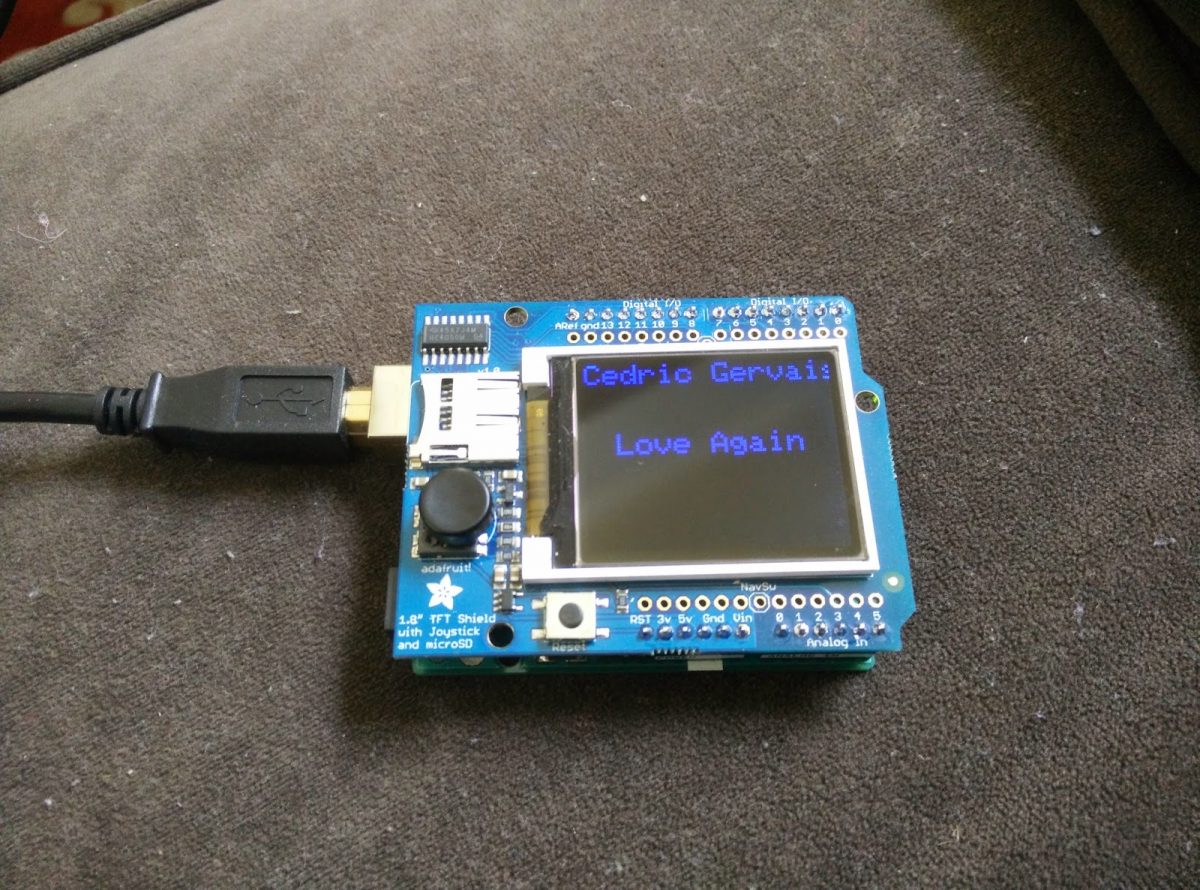
Adafruit 1.8″ TFT Shield
Software:
Mac OS X 10.8.5 Mountain Lion
rb-appscript 0.6.1
Ruby

There are three steps to this project:
- Interact with Spotify and be able to get the artist and song as well as perform actions such as next track, previous track, play/pause, increase volume and decrease volume.
- Use the serial port through USB to send data between Arduino and Mac.
- Display song, artist and use joystick input for controls.
Step 1: Interact with Spotify
Install rb-applescript
gem install rb-applescript
 require 'appscript'

 spot = Appscript.app('Spotify')
 spot.launch

 # Get track info
 artist = spot.current_track.artist.get
 song = spot.current_track.name.get

 # Toggle play/pause
 spot.playpause

 # Play next track
 spot.previous_track

 # Play next track
 spot.next_track

 # Get volume
 curVol = spot.sound_volume.get

 # Decrease volume
 spot.sound_volume.set(curVol - 10)

 # Increase volume
 spot.sound_volume.set(curVol + 10)
Step 2: Use Serial Port with Arduino
Ruby has a serial port gem that allows you to read/write from the serial port to your Arduino:
gem install serialport
Example:
 # Gem for serial port IO
 require 'serialport'

 # Include Input stream ready?
 require 'io/wait'

 # Open serial port to your port location
 sp = SerialPort.new("/dev/cu.usbmodem411", 9600)

 # Write to serial port
 sp.write("hellon")

 # Nonblocking read from serial
 while true
  # Other actions...

  # Nonblocking input
  if sp.ready?
   # Get string and chomp rn from end of string
   str = sp.gets.chomp
   puts str
  end
The Arduino Uno can also send and receive from USB port:
 // Input from serial port
 if(Serial.available() > 0){
  String data = Serial.readString();
 }
 // Output to serial port
 Serial.println("output");
Step 3: Display with Arduino and read Joystick
The 1.8″ TFT Shield I bought from Adafruit came with a graphics library for drawing shapes and text. We can use it to draw the current song and track to the screen.
 void printArtist(uint16_t color) {
  tft.setCursor(0, 0);
  tft.setTextSize(2);
  tft.setTextColor(color);
  tft.setTextWrap(false);
  tft.print(artist);
 }
 void printSong(uint16_t color) {
  tft.setCursor(x, 50);
  tft.setTextSize(2);
  tft.setTextColor(color);
  tft.setTextWrap(false);
  tft.print(song);
 }
Since the screen is not wide enough to display a full song name, we will animate the song text by scrolling to the left. We will do this by redrawing the song name X units to the left every 0.5 seconds where X is determined by the desired scroll speed. When we redraw, we draw the song text of the previous position in the background color and then we draw the song text again in the text color shifted X units left. We do this because we want to minimize the number of pixel draws since redrawing the screen causes a flicker. When the end of the song name reaches the screen, we need to reset it back to the original position. The width of each character in text size 2 is 12 pixels and the screen width is 128 pixels so if x < -12 *song.length() + 128, we reset x.
In our loop() function:
 if(time + 500 < millis()) {
  time = millis();
  printSong(ST7735_BLACK);
  x -= SCROLL;
  if(x < (-12 * (int)song.length() + 128)){
   x = SCROLL;
  }
  printSong(ST7735_BLUE);
 }
The joystick can be read by reading analog 3.
 #define Neutral 0
 #define Press 1
 #define Up 2
 #define Down 3
 #define Right 4
 #define Left 5
 int CheckJoystick(){
  int joystickState = analogRead(3);
  if (joystickState < 50) return Left;
  if (joystickState < 150) return Down;
  if (joystickState < 250) return Press;
  if (joystickState < 500) return Right;
  if (joystickState < 650) return Up;
  return Neutral;
 }
We only send the state of the joystick if it changes:
 int curCmd = CheckJoystick();
  if(curCmd != lastCmd){
  Serial.println(curCmd);
  lastCmd = curCmd;
 }
In our ruby app, we can perform actions based on the joystick state.
Putting it all together:
https://github.com/ayoungprogrammer/arduino-spotify-controller