Determining Gender of a Name with 80% Accuracy Using Only Three Features

Categories Uncategorized

Introduction

I thought an easy project to learn machine learning was to guess the gender of a name using characteristics of the name. After playing around with different features by encoding characters of the name, I discovered you only needed THREE features for 80% accuracy which is pretty impressive. I am by no means an expert at machine learning, so if you see any errors, feel free to point them out.

Example:

Name Actual Classified
shea F F
lucero F M
damiyah F F
nitya F F
sloan M M
porter F M
jalaya F F
aubry F F
mamie F F
jair M M

(Click here for Source: IPython Notebook)

Dataset

The dataset used for getting names was from SSN’s baby names dataset for the year 2014.
https://www.ssa.gov/oact/babynames/names.zip

Methodology

I took all the baby names from the dataset that had at least 20 people for male and female since I found many names were low quality when they are least used (for example, there are a few guys named Amy born in 2014).

Loading

Code for loading data from dataset into numpy arrays ready for machine learning

import numpy as np from sklearn.cross_validation
import train_test_split, cross_val_score from sklearn.ensemble
import RandomForestClassifier from sklearn
import svm my_data = np.genfromtxt('names/yob2014.txt', delimiter=',', dtype=[('name','S50'), ('gender','S1'),('count','i4')], converters={0: lambda s:s.lower()})
my_data = np.array([row for row in my_data if row[2]>=20])
name_map = np.vectorize(name_count, otypes=[np.ndarray])
Xlist = name_map(my_data['name'])
X = np.array(Xlist.tolist())
y = my_data['gender']

X is an np.array of N * M, where N is number of names and M is number of features
y is M or F
name_map will be a function that converts a name (string) to an array of features

Fitting and Validation

We will be splitting the data into training and testing for cross-validation and using RandomForrest for classification since it performs well at classifying data.
for x in xrange(5):
 Xtr, Xte, ytr, yte = train_test_split(X, y, test_size=0.33)
 clf = RandomForestClassifier(n_estimators=100, min_samples_split=2)
 clf.fit(Xtr, ytr)
 print np.mean(clf.predict(Xte) == yte)
By default, RandomForest will set max_features(number of features to look at before split) = n_features which is recommended for classification problems (http://scikit-learn.org/stable/modules/ensemble.html#parameters). We will be using n_estimator (number of trees) of 100 and a min_samples_split (the minimum number of samples required to split an internal node) of 2 which we will tune when we determine a good feature set.

Picking Features

Character Frequency

My first attempt at features was the frequency of each character:
def name_count(name):
 arr = np.zeros(52)
 for ind, x in enumerate(name):
 arr[ord(x)-ord('a')] += 1
 return arr
Example:
aaabd
freq: [a:3, b:1, d:1]
* Note that we encode freq as an array using index of letter. e.g.: [3, 1, 0, 1, 0, 0, …. 0]. Most of the array will be zeroes.
Accuracy:
0.690232056125
0.692390717755
0.693739881274
0.688073394495
0.694819212089
Not bad for simple features.

Character Frequency + Order

Second attempt at features is frequency + ordering:
def name_count(name):
 arr = np.zeros(52)
 for ind, x in enumerate(name):
 arr[ord(x)-ord('a')] += 1
 arr[ord(x)-ord('a')+26] += ind+1
 return arr
Example: aaabc
freq: [a:3, b:1, c:1]
ord: [a:6, b:4, c:5]

We can combine these encodings by adding the two arrays together and offsetting the second array

Accuracy:
0.766864543983
0.760388559093
0.766864543983
0.76740420939
0.759848893686
We are getting somewhere!

Character Frequency + Order + 2-grams

Let’s trying adding all the 2-grams in the name as features to see if we can get more info.
def name_count(name):
 arr = np.zeros(52+26*26)
 # Iterate each character
 for ind, x in enumerate(name):
 arr[ord(x)-ord('a')] += 1
 arr[ord(x)-ord('a')+26] += ind+1
 # Iterate every 2 characters
 for x in xrange(len(name)-1):
 ind = (ord(name[x])-ord('a'))*26 + (ord(name[x+1])-ord('a'))
 arr[ind] += 1
 return arr
Example: aaabc
freq: [a:3, b:1, c:1]
ord: [a:6, b:4, c:5]
2-gram: [ aa: 2, ab: 1, bc: 1]
We can encode 2-grams by converting from base 26, e.g.-> aa = 0, bc = 26 + 2 = 28

Accuracy:

0.78548300054
0.771451699946
0.783864004317
0.777388019428
0.77172153265

We get a slight increase in accuracy, but I think we can do better.

Character Frequency + Order + 2-grams + Heuristics

Examining the names more in depth, I hypothesized that the length of name and last and second character of the name could be important.
def name_count(name):
 arr = np.zeros(52+26*26+3)
 # Iterate each character
 for ind, x in enumerate(name):
 arr[ord(x)-ord('a')] += 1
 arr[ord(x)-ord('a')+26] += ind+1
 # Iterate every 2 characters
 for x in xrange(len(name)-1):
 ind = (ord(name[x])-ord('a'))*26 + (ord(name[x+1])-ord('a')) + 52
 arr[ind] += 1
 # Last character
 arr[-3] = ord(name[-1])-ord('a')
 # Second Last character
 arr[-2] = ord(name[-2])-ord('a')
# Length of name
arr[-1] = len(name)
return arr
Example: aaabc
freq: [a:3, b:1, c:1]
ord: [a:6, b:4, c:5]
2-gram: [ aa: 2, ab: 1, bc: 1]
last_char: 3
second_last_char: 2
length: 5
Accuracy:
0.801672962763
0.804641122504
0.803022126282
0.801672962763
0.805450620615

Fine-tuning

After playing around with n_estimators and min_samples_split, I found good values:
clf = RandomForestClassifier(n_estimators=150, min_samples_split=20)
which gives the accuracy:

0.814085267134
0.821370750135
0.818402590394
0.825148407987
0.82245008095

Which gives us a small accuracy increase.

Feature Reduction

Let’s look at the 10 most important features as given by clf.feature_importances:
[728  26 729   0  40  50  30 390  39  37]
[728  26 729  50   0  40  37  30  34 390]
[728  26 729  50  40   0  37  30  39 390]
[728  26 729   0  50  40  30  37 390  39]
[728  26 729   0  50  40  30  37  39  34]

These numbers refer to the feature index by most importance.

728 – Last character
26 – Order of a
729 – Second last character
0 – Number of a’s
50 – order of y

40 – order of o

It looks these 6 features are consistently good.
Let’s see how good the top feature is
def name_count(name):
 arr = np.zeros(1)
 arr[0] = ord(name[-1])-ord('a')+1
 return arr

Accuracy:

0.771451699946
0.7536427415
0.753912574204
0.7536427415
0.760658391797

Wow! We actually get 75% accuracy! This means the last letter of a name is really important in determining the gender.

Let’s take the top three features (last and second last character  and order of a’s) and see the importance of these. (But if you already read the title of this blog post, you should know what to expect.)

def name_count(name):
 arr = np.zeros(3)
 arr[0] = ord(name[-1])-ord('a')+1
 arr[1] = ord(name[-2])-ord('a')+1
 # Order of a's
 for ind, x in enumerate(name):
 if x == 'a':
 arr[2] += ind+1
 return arr

Accuracy:

0.798165137615
0.794117647059
0.795736643281
0.801133297356
0.803561791689

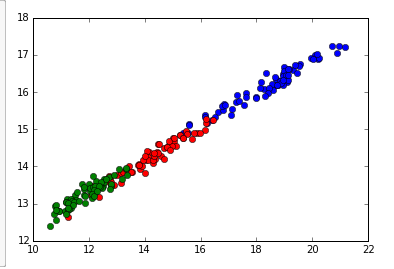
I would say 80% accuracy for 3 features is pretty good for determining gender of a name. Thats about the same accuracy as a mammogram detecting cancer in a 45-49 year old woman!

Sample Example

We can sample random datapoints to see how well our model is performing:
def name_count(name):
 arr = np.zeros(3)
 arr[0] = ord(name[-1])-ord('a')+1
 arr[1] = ord(name[-2])-ord('a')+1
 # Order of a's
 for ind, x in enumerate(name):
 if x == 'a':
 arr[2] += ind+1
 
 return arr

my_data = np.genfromtxt('names/yob2014.txt', 
 delimiter=',', 
 dtype=[('name','S50'), ('gender','S1'),('count','i4')],
 converters={0: lambda s:s.lower()})
my_data = np.array([row for row in my_data if row[2]>=20])
name_map = np.vectorize(name_count, otypes=[np.ndarray])
Xname = my_data['name']
Xlist = name_map(Xname)
X = np.array(Xlist.tolist())

y = my_data['gender']

Xtr, Xte, ytr, yte = train_test_split(X, y, test_size=0.33)
clf = RandomForestClassifier(n_estimators=150, min_samples_split=20)
clf.fit(Xtr, ytr)

idx = np.random.choice(np.arange(len(Xlist)), 10, replace=False)
xs = Xname[idx]
ys = y[idx]
pred = clf.predict(X[idx])

for a,b, p in zip(xs,ys, pred):
 print a,b, p

Output:

Name Actual Classified
shea F F
lucero F M
damiyah F F
nitya F F
sloan M M
porter F M
jalaya F F
aubry F F
mamie F F
jair M M

Conclusion

Many features are good, but finding important features is better.
If you are unsure of a gender of a name, just look at the last letter which gives you a 75% chance of getting it.

I hope you have learned something from reading this blog post as I did writing it!(Click here for Source: IPython Notebook)

Tutorial: Getting Started with Distributed Deep Learning with Caffe on Windows

Categories Machine Learning, Uncategorized

Introduction

What is Caffe?

A deep learning framework developed by Berkeley Vision and Learning Center. It makes creating deep neural networks easy without writing a ton of code.If you don’t know what deep learning is, here is a great guide to getting started: http://cs231n.github.io/.

Setup

My setup:
Windows 8.1 on 64bit
Visual Studio 2013 Community
GeForce GT 750M
CUDA 7.5

1. Check for Compatibility

Make sure you are on a supported Windows operating system:
Windows 8.1
Windows 7
Windows Server 2008
Windows Server 2012.(If you are using Windows 8, upgrade through here: http://windows.microsoft.com/en-ca/windows-8/update-from-windows-8-tutorial)

Make sure your GPU is supported by CUDA: https://developer.nvidia.com/cuda-gpus 
Anything with compute capability of  >=3.0 should be good.

If you do not have a compatible GPU, you can still use Caffe but it will be magnitudes slower than with a GPU and skip part 2.

Make sure you have a compatible Visual Studios for CUDA support: 
Visual Studio 2013
Visual Studio 2013 Community (Download Visual Studio 2013 Community Edition Free)
Visual Studio 2012
Visual Studio 2010

More nVidia documentation at:
http://docs.nvidia.com/cuda/cuda-getting-started-guide-for-microsoft-windows/#axzz3wsl3JktL 

2. Install CUDA

Download and install CUDA toolkit here: https://developer.nvidia.com/cuda-downloads
 
Verify CUDA can compile:
Go to C:ProgramDataNVIDIA CorporationCUDA Samplesv7.5 and open the solution file (i.e. Samples_vs2013.sln) in Visual Studio
In the solution explorer, build 0_Simple/vectorAdd
Run C:ProgramDataNVIDIA CorporationCUDA Samplesv7.5binwin64debugvectorAdd.exe
 
The output should be:
Copy input data from the host memory to the CUDA device
CUDA kernel launch with 196 blocks of 256 threads
Copy output data from the CUDA device to the host memory
Test PASSED
Done

3. Install Caffe

Fork the windows port of Caffe: https://github.com/happynear/caffe-windowsDownload third party libraries and extract to caffe-windows/3rdparty
Remember to add caffe-windows/3rdparty/bin to your PATH

Open caffe-windows/buildVS2013/MainBuilder.sln in Visual Studio
If you don’t have a compatible GPU, open caffe-windows/build_cpu_only/MainBuilder.sln

Set the GPU compatible mode:
Right click the caffe project and click properties
In the left menu, go to Configuration Properties -> Cuda C/C++ -> Device
In the Code Generation key, modify the compute capabilities to your GPU’s (such as compute_30,sm_30; etc)

Build the solution in release mode
Right click the solution and click Build Solution
(It’s OK if matcafe and pycafe fail)

Testing
Download the mnist leveldb from http://pan.baidu.com/s/1mgl9ndu
Extract the folders to caffe-windows/examples/mnist
Run caffe-windows/run_mnist.bat

You should get some output similar to the following when you finish:
….
I0112 00:06:37.180341 45040 solver.cpp:326] Iteration 10000, loss = 0.00428135
I0112 00:06:37.181342 45040 solver.cpp:346] Iteration 10000, Testing net (#0)
I0112 00:06:51.726634 45040 solver.cpp:414]     Test net output #0: accuracy = 0
.9914
I0112 00:06:51.726634 45040 solver.cpp:414]     Test net output #1: loss = 0.027
0199 (* 1 = 0.0270199 loss)
I0112 00:06:51.726634 45040 solver.cpp:331] Optimization Done.
I0112 00:06:51.726634 45040 caffe.cpp:215] Optimization Done.

Full instructions can be found on the readme of https://github.com/happynear/caffe-windows

Results:
solver_mode: GPU
Start Time: 23:25:19.38
Finish Time: 23:28:37.62

solver_mode: CPU

Start Time: 23:38:01.62
Finish Time:  0:06:51.91As you can see, even a low-end GPU can train a magnitude faster than a CPU.

A Simple Artificial Intelligence Capable of Basic Reading Comprehension

Categories Machine Learning, Uncategorized
I was interested in an artificial intelligence that could do reading comprehension, but surprisingly,  I could not find much on the topic. I decided to try and create an AI that could do some basic reading comprehension and I got some good results:

Short Passage (Input):
Mary went sledding with her family. Mary won a race against her brother to the bottom of a hill. Mary cheered because it was her first time winning.

Input: Where did Mary go?
Output: Sledding

Input: What did Mary win?
Output: A race


Input: Who did Mary win a race against?
Output: Her brother

Input: Where did Mary win a race to?
Output: The bottom of the hill


Input: Why did Mary cheer?
Output: Because it was her first time winning


As we can see, the program can actually answer the questions about the passage.

Full Source Available Here

Introduction

What I am trying to accomplish is program capable of artificial semantic memory. Semantic memory refers to how we store our explicit knowledge and facts about the world. For example, our memory of our birth date or our knowledge that humans are mammals. I wanted to be able to make something that was able to read a passage and answer any questions I had.

Abstract Idea

An abstract idea of how I accomplished artificial semantic memory was to create a structure that can store a sentence in a different way that can be used to answer questions.

1. Structure the relationships betweens objects (nouns) in the sentence.

For example, in the sentence “Mary went sledding with her family”, there are three objects “Mary”, “sledding” and “her family”. Mary has a verb “go” (present tense of went) with the object “sledding”. The verb “go” is “with” the object “her parents”. 
After brainstorming different ways to represent the relationships between objects and actions, I came up with a structure similar to a trie which I will call a “word graph”. In a word graph, each word is a node and the edges are actions or propositions. 
Examples:
Mary went sledding with her family
Mary won a race against her brother to the bottom of the hill
Mary cheered because it was her first time winning

2. Answer questions using the structure.

A key observation to answering questions is that they can be reworded to be fill in the blanks. 
Examples:
Where did Mary go -> Mary went _______
What did Mary win -> Mary won _______
Who did Mary win a race against? -> Mary won a race against _______
Why did Mary cheer -> Mary cheered because/since _______
We can use this observation to read out answers from our tree structure. We can parse the question, convert it to a fill in the blank format and then 
Example:
Mary went _____
By following the tree, we see that we should put “sledding” in the blank.
Mary won _______
Mary won a race against ______
Mary won a race to ______
By following the tree, we see that Mary won “a race”, against “her brother”, to “the bottom”.

Implementation

I chose to implement this in Python since it is easy to use and has libraries to support natural language processing. There are three steps in my program: parsing, describing and answering. 
Parsing converting a sentence to a structure that makes sense of the sentence structure.
Describing is reading in a sentence and adding the information to our tree structure.
Answering is reading in a question, changing the format and completing from our tree structure.

Parsing

The first thing we have to do is parse the sentence to see the sentence structure and to determine which parts of a sentence are objects, verbs and propositions. To do this, I used the Stanford parser which works well enough for most cases. 
Example: the sentence “Mary went sledding with her family” becomes:
  (S
    (NP (NNP Mary))
    (VP
      (VBD went)
      (NP (NN sledding))
      (PP (IN with) (NP (PRP$ her) (NN family)))))
The top level tree S (declarative clause) has two children, NP (noun phrase) and VP (verb phrase). The NP consist of one child NNP (proper noun singular) which is “Mary”. The VP has three children: VBD (verb past tense) which is “went”, NP, and a PP (propositional phrase). We can use the recursive structure of a parse tree to help us build our word graph.

A full reference for the parsers tags can be found here.

I put the Stanford parser files in my working directory but you might want to change the location to where you put the files.

os.environ['STANFORD_PARSER'] = '.'
os.environ['STANFORD_MODELS'] = '.'

parser = stanford.StanfordParser()

line = 'Mary went sledding with her family'
tree = list(parser.raw_parse(line))[0]

Describing

We can use the parse tree to build the word graph by doing it recursively. For each grammar rule, we need to describe how to build the word graph.

Our method looks like this:

# Returns edge, node 
def describe(parse_tree):

 ...

  if matches(parse_tree,'( S ( NP ) ( VP ) )'):

    np = parse_tree[0] # subject
    vp = parse_tree[1] # action

    _, subject = describe(np) # describe noun
    action, action_node = describe(vp) # recursively describe action

    subject.set(action, action_node) # create new edge labeled action to the action_node
    return action, action_node

  ....
We do this for each grammar rule to recursively build the word graph. When we see a NP (noun phrase) we treat it as an object and extract the words from it. When we see a proposition or verb, we attach it to the current node and when we see another object, we use a dot ( . ) edge to indicate the object of the current node.

Currently, my program supports the following rules:

( S ( NP ) ( VP ) )
( S ( VP ) )
( NP )
( PP ( . ) ( NP ) )
( PRT )
( VP ( VBD ) ( VP ) $ )
( VP ( VB/VBD ) $ )
( VP ( VB/VBZ/VBP/VPZ/VBD/VBG/VBN ) ( PP ) )
( VP ( VB/VBZ/VBP/VPZ/VBD/VBG/VBN ) ( PRT ) ( NP ) )
( VP ( VB/VBZ/VBP/VPZ/VBD/VBG/VBN ) ( NP ) )
( VP ( VB/VBZ/VBP/VPZ/VBD/VBG/VBN ) ( NP ) ( PP ) )
( VP ( VB/VBZ/VBP/VPZ/VBD/VBG ) ( S ) )
( VP ( TO ) ( VP ) )
( VP ( VB/VBZ/VBP/VPZ/VBD/VBG/VBN ) ( ADJP ) )
( VP ( VB/VBZ/VBP/VPZ/VBD/VBG/VBN ) ( SBAR ) )
( SBAR ( IN ) ( S ) )

For verbs, I used Nodebox (a linguistic library) for getting the present tense of a word so that the program knows different tenses of a word. E.g. “go” is the same word as “went”. 

Answering

We can answer questions by converting the question to a “fill in the blank” and then following the words in the “fill in the blank” in the word graph to the answer. My program supports two types of fill in the blanks: from the end and from the beginning.

Type I: From the end

A from the end type of fill in the blank is a question like:

Where did Mary go?

Which converts to:

Mary went _______

And as you can see, the blank comes at the end of the sentence. We can fill in this blank by following each word in our structure to the answer. A sample of the code is below:

# Matches "Where did Mary go"
if matches(parse_tree, '( SBARQ ( WHADVP ) ( SQ ( VBD ) ( NP ) ( VP )  )'):

  tokens = get_tokens(parse_tree) # Get tokens from parse tree

  subject = get_node(tokens[3]) # Get subject of sentence

  tokens = tokens[3:] # Skip first two tokens to make fill in the blank

  return subject.complete(tokens) # Complete rest of tokens
The node completes by reading each token and following the corresponding edges. When we run out of tokens, we follow the first edge until we reach another object and return the edges followed and the object.

Simplified node.complete:

class Node:
  ...
  def complete(self, tokens, qtype):
    if len(tokens) == 0:
      # no tokens left
      if qtype == 'why':
        # special case
        return self.why()
      if self.isObject:
        # return object
        return self.label
      else:
        # follow first until object
        return self.first.label + self.first.complete(tokens, qtype) 
    else:
      for edge, node in self:
        if edge == tokens[0]:
          # match rest of tokens
          return node.complete(tokens, qtype) 
      return "No answer"
  ...

We have to handle “Why” as a special case because we need to complete with “because” or “since” after there are no more tokens and we have to iterate backwards to the first object.

Type 2: From the beginning

A from the beginning type is a question like:

Who went sledding?

Which converts to:

 ____ went sledding?

As we can see, the blank is at the beginning of the sentence and my solution for this was to iterate through all possible objects and see which objects have tokens that match the rest of the fill in the bank.

Further Steps

There is still a long way to go, to make an AI perform reading comprehension at a human level. Below are some possible improvements and things to handle to make the program better:

Grouped Objects

We need to be able to handle groups of objects, e.g. “Sarah and Sam walked to the beach” should be split into two individual sentences.

Pronoun Resolution

Currently, pronouns such as he and she are not supported and resolution can be added by looking at the last object. However, resolution is not possible in all cases when there are ambiguities such as “Sam kicked Paul because he was stupid”. In this sentence “he” could refer to Sam or Paul.

Synonyms

If we have the sentence: “Jack leaped over the fence”, the program will not be able to answer “What did Jack jump over” since the program interprets jump as a different word than leap. However, we can solve this problem by using asking the same question for all synonyms of the verb and seeing if any answers work.

Augmented Information

If we have the sentence “Jack threw the football to Sam”, the program would not be able to answer “Who caught the football”. We can add information such as “Sam caught the football from Jack” which we can infer from the original sentence.

Aliasing

Sometimes objects can have different names, e.g. “James’s dog is called Spot” and the program should be able to know that James’ dog and Spot both refer to the same object. We can do this by adding a special rule for words such as “called”, “named”, “also known as” , etc.

Other

There are probably other quirks of language that need to be handled and perhaps instead of explicitly handling all these cases, we should come up with a machine learning model that can read many passages and be able to construct a structure of the content as well as to augment any additional information.

Full Source Available Here

Tutorial: Getting Started with Machine Learning with the SciPy stack

Categories Machine Learning, Uncategorized
There are many machine learning libraries out there, but I heard that SciPy was good so I decided to try it out. We will be doing a simple walkthrough a k means clustering example:

Full Source Here


Sample Data Here

SciPy Stack

The contents of the SciPy stack are:

Python: Powerful scripting language
Numpy: Python package for numerical computing
SciPy: Python package for scientific computing
Matplotlib: Python package for plotting
iPython: Interactive python shell
Pandas: Python package for data analysis
SymPy: Python package for computer algebra systems
Nose: Python package for unit tests

Installation

I will go through my Mac installation but if you are using another OS, you can find the installation instructions for SciPy on: http://www.scipy.org/install.html.

You should have Python 2.7.

Mac Installation

I am using a Mac on OS X 10.8.5 and used MacPorts to setup the SciPy stack on my machine.

Install macports if you haven’t already: http://www.macports.org/

Otherwise open Terminal and run: ‘sudo macports selfupdate’

Next in your Terminal run: ‘sudo port install py27-numpy py27-scipy py27-matplotlib py27-ipython +notebook py27-pandas py27-sympy py27-nose’

Run the following in terminal to select package versions.

sudo port select –set python python27
sudo port select –set ipython ipython27

Hello World

IPython allows you to create interactive python notebooks in your browser. We will get started by creating a simple hello world notebook.
Create a new directory where you want your notebooks to be placed in.
In your directory, run in terminal:
ipython notebook

This should open your browser to the IPython notebook web interface. If it does not open, point your browser to http://localhost:8888.

 Click New -> Notebooks -> Python 2


This should open a new tab with a newly create notebook.

Click Untitled at the top, rename the notebook to Hello World and press OK.

In the first line, change the line format from Code to Markdown and type in:

# Hello World Code

And click run (the black triangle that looks like a play button)

On the next line, in code, type:

print ‘Hello World’

and press run.

K Means Clustering Seed Example

Suppose we are doing a study on a wheat farm to determine how much of each kind of wheat is in the field. We collect a random sample of seeds from the field and measure different attributes such as area, perimeter, length, width, etc. Using this attributes we can use k-means clustering to classify seeds into different types and determine the percentage of each type.

Sample data can be found here: http://archive.ics.uci.edu/ml/datasets/seeds

The sample data contains data that comes from real measurements. The attributes are:

1. area A, 
2. perimeter P, 
3. compactness C = 4*pi*A/P^2, 
4. length of kernel, 
5. width of kernel, 
6. asymmetry coefficient 
7. length of kernel groove. 

Example: 15.26, 14.84, 0.871, 5.763, 3.312, 2.221, 5.22, 1

Download the file into the same folder as your notebook.

Code

Create a new notebook and name it whatever you want. We can put all the code into one cell.

First, we need to parse the data so that we can run k-means on it. We open the file using a csv reader and convert each cell to a float. We will skip rows that contain missing data.

Sample row:

['15.26', '14.84', '0.871', '5.763', '3.312', '2.221', '5.22', '1']
# Read data
for row in bank_csv:
    missing = False
    float_arr = []
    for cell in row:
        if not cell:
            missing = True
            break
        else:
            # Convert each cell to float
            float_arr.append(float(cell))
    # Take row if row is not missing data
    if not missing:
        data.append(float_arr)
data = np.array(data)

Next, we normalize the features for the k means algorithm. Since Scipy implements the k means clustering algorithm for us, all the hard work is done.

# Normalize vectors
whitened = vq.whiten(data)

# Perform k means on all features to classify into 3 groups
centroids, _ = vq.kmeans(whitened, 3)

We then classify each data point by distance to centroid:

# Classify data by distance to centroids
cls, _ = vq.vq(whitened, centroids)

Finally, we can graph the classifications of the data points by the first two features. There are seven features total, but it would be hard to visualize. You can graph by other features for similar visualizations.

# Plot first two features (area vs perimter in this case)
plt.plot(data[cls==0,0], data[cls==0,6],'ob',
        data[cls==1,0], data[cls==1,6],'or',
        data[cls==2,0], data[cls==2,6],'og')
plt.show()

Note: to show the plot inline in the cell, we put ‘%matplotlib inline’ at the beginning of the cell.

Sample Data Here

Using an Arduino Uno as a Spotify Controller on Mac

Categories Uncategorized
I recently bough an Arduino Uno with a 1.8″ TFT Arduino Shield and I thought I would have some fun with it by using it as a Spotify controller.

Hardware:
Arduino Uno
Adafruit 1.8″ TFT Shield

Software:
Mac OS X 10.8.5 Mountain Lion
rb-appscript 0.6.1
Ruby

There are three steps to this project:

  1. Interact with Spotify and be able to get the artist and song as well as perform actions such as next track, previous track, play/pause, increase volume and decrease volume.
  2. Use the serial port through USB to send data between Arduino and Mac.
  3. Display song, artist and use joystick input for controls.

Step 1: Interact with Spotify

The Mac version of Spotify supports Applescript so we can use that to perform the actions we need. However, I wanted to keep all the app code in the same language (Ruby) and in the same script so I found a gem (rb-applescript) that executes Applescript with Ruby.

Install rb-applescript
gem install rb-applescript

For example:
 require 'appscript'  
   
 spot = Appscript.app('Spotify')  
 spot.launch  
   
 # Get track info  
 artist = spot.current_track.artist.get  
 song = spot.current_track.name.get  
   
 # Toggle play/pause  
 spot.playpause  
   
 # Play next track  
 spot.previous_track  
   
 # Play next track  
 spot.next_track  
   
 # Get volume  
 curVol = spot.sound_volume.get  
   
 # Decrease volume  
 spot.sound_volume.set(curVol - 10)  
   
 # Increase volume  
 spot.sound_volume.set(curVol + 10)  
   

Step 2: Use Serial Port with Arduino

Ruby has a serial port gem that allows you to read/write from the serial port to your Arduino:

gem install serialport

Example:

 # Gem for serial port IO  
 require 'serialport'  
   
 # Include Input stream ready?  
 require 'io/wait'  
   
 # Open serial port to your port location  
 sp = SerialPort.new("/dev/cu.usbmodem411", 9600)  
   
 # Write to serial port  
 sp.write("hellon")  
   
 # Nonblocking read from serial   
 while true  
  # Other actions...  
   
  # Nonblocking input  
  if sp.ready?  
   # Get string and chomp rn from end of string  
   str = sp.gets.chomp  
   puts str
  end

The Arduino Uno can also send and receive from USB port:

 // Input from serial port  
 if(Serial.available() > 0){  
  String data = Serial.readString();  
 }  
 // Output to serial port  
 Serial.println("output");  

Step 3: Display with Arduino and read Joystick

The 1.8″ TFT Shield I bought from Adafruit came with a graphics library for drawing shapes and text. We can use it to draw the current song and track to the screen.

 void printArtist(uint16_t color) {  
  tft.setCursor(0, 0);  
  tft.setTextSize(2);  
  tft.setTextColor(color);  
  tft.setTextWrap(false);  
  tft.print(artist);  
 }  
 void printSong(uint16_t color) {  
  tft.setCursor(x, 50);  
  tft.setTextSize(2);  
  tft.setTextColor(color);  
  tft.setTextWrap(false);  
  tft.print(song);  
 }  

Since the screen is not wide enough to display a full song name, we will animate the song text by scrolling to the left. We will do this by redrawing the song name X units to the left every 0.5 seconds where X is determined by the desired scroll speed. When we redraw, we draw the song text of the previous position in the background color and then we draw the song text again in the text color shifted X units left. We do this because we want to minimize the number of pixel draws since redrawing the screen causes a flicker. When the end of the song name reaches the screen, we need to reset it back to the original position. The width of each character in text size 2 is 12 pixels and the screen width is 128 pixels so if x < -12 *song.length() + 128, we reset x.

In our loop() function:

 if(time + 500 < millis()) {  
  time = millis();  
  printSong(ST7735_BLACK);  
  x -= SCROLL;  
  if(x < (-12 * (int)song.length() + 128)){  
   x = SCROLL;  
  }  
  printSong(ST7735_BLUE);  
 }  

The joystick can be read by reading analog 3.

 #define Neutral 0  
 #define Press 1  
 #define Up 2  
 #define Down 3  
 #define Right 4  
 #define Left 5  
 int CheckJoystick(){  
  int joystickState = analogRead(3);  
  if (joystickState < 50) return Left;  
  if (joystickState < 150) return Down;  
  if (joystickState < 250) return Press;  
  if (joystickState < 500) return Right;  
  if (joystickState < 650) return Up;  
  return Neutral;  
 }  

We only send the state of the joystick if it changes:

 int curCmd = CheckJoystick();  
  if(curCmd != lastCmd){  
  Serial.println(curCmd);  
  lastCmd = curCmd;  
 }  

In our ruby app, we can perform actions based on the joystick state.

Putting it all together:

https://github.com/ayoungprogrammer/arduino-spotify-controller

The Computer Science Handbook – A Reference for Algorithms and Data Structures

Categories Uncategorized
I’ve been working on this site that teaches algorithms and data structures in a way that doesn’t require a strong math background. It’s meant for supplementary material for university courses, reviewing for job interviews or an everyday day reference. Please check it out and I hope you find it helpful in your future endeavors!

Real time QR Code / Bar code detection with webcam using OpenCV and ZBar

Categories Computer Vision, Uncategorized

Tutorial: Real time QR Code / Bar code detection using webcam video feed / stream using OpenCV and ZBar

Pre-requisites:

You will need to have installed OpenCV and ZBar (see previous tutorials) for this to work.

Source on Github:  https://github.com/ayoungprogrammer/WebcamCodeScanner

Code:

 #include <opencv2/highgui/highgui.hpp>  
 #include <opencv2/imgproc/imgproc.hpp>  
 #include <zbar.h>  
 #include <iostream>  
 using namespace cv;  
 using namespace std;  
 using namespace zbar;  
 //g++ main.cpp /usr/local/include/ /usr/local/lib/ -lopencv_highgui.2.4.8 -lopencv_core.2.4.8  
 int main(int argc, char* argv[])  
 {  
   VideoCapture cap(0); // open the video camera no. 0  
   // cap.set(CV_CAP_PROP_FRAME_WIDTH,800);  
   // cap.set(CV_CAP_PROP_FRAME_HEIGHT,640);  
   if (!cap.isOpened()) // if not success, exit program  
   {  
     cout << "Cannot open the video cam" << endl;  
     return -1;  
   }  
   ImageScanner scanner;   
    scanner.set_config(ZBAR_NONE, ZBAR_CFG_ENABLE, 1);   
   double dWidth = cap.get(CV_CAP_PROP_FRAME_WIDTH); //get the width of frames of the video  
   double dHeight = cap.get(CV_CAP_PROP_FRAME_HEIGHT); //get the height of frames of the video  
   cout << "Frame size : " << dWidth << " x " << dHeight << endl;  
   namedWindow("MyVideo",CV_WINDOW_AUTOSIZE); //create a window called "MyVideo"  
   while (1)  
   {  
     Mat frame;  
     bool bSuccess = cap.read(frame); // read a new frame from video  
      if (!bSuccess) //if not success, break loop  
     {  
        cout << "Cannot read a frame from video stream" << endl;  
        break;  
     }  
     Mat grey;  
     cvtColor(frame,grey,CV_BGR2GRAY);  
     int width = frame.cols;   
     int height = frame.rows;   
     uchar *raw = (uchar *)grey.data;   
     // wrap image data   
     Image image(width, height, "Y800", raw, width * height);   
     // scan the image for barcodes   
     int n = scanner.scan(image);   
     // extract results   
     for(Image::SymbolIterator symbol = image.symbol_begin();   
     symbol != image.symbol_end();   
     ++symbol) {   
         vector<Point> vp;   
     // do something useful with results   
     cout << "decoded " << symbol->get_type_name() << " symbol "" << symbol->get_data() << '"' <<" "<< endl;   
       int n = symbol->get_location_size();   
       for(int i=0;i<n;i++){   
         vp.push_back(Point(symbol->get_location_x(i),symbol->get_location_y(i)));   
       }   
       RotatedRect r = minAreaRect(vp);   
       Point2f pts[4];   
       r.points(pts);   
       for(int i=0;i<4;i++){   
         line(frame,pts[i],pts[(i+1)%4],Scalar(255,0,0),3);   
       }   
       //cout<<"Angle: "<<r.angle<<endl;   
     }   
     imshow("MyVideo", frame); //show the frame in "MyVideo" window  
     if (waitKey(30) == 27) //wait for 'esc' key press for 30ms. If 'esc' key is pressed, break loop  
     {  
       cout << "esc key is pressed by user" << endl;  
       break;   
     }  
   }  
   return 0;  
 }  

To Test

Find any QR code or bar code and hold it close to your webcam and it should pick up.

Extacting Regions of Interest using Page Markers

Categories Computer Vision, Uncategorized

Source on GitHub: https://github.com/ayoungprogrammer/OMR-Example

Introduction

Optical Mark Recognition is recognizing certain “marks” on an image and using those marks as a reference point to extract other regions of interest (ROI) on the page. OMR is a relatively new technology and there is close to no documentation on the subject. Current OMR technologies like ScanTron require custom machines designed specifically to scan custom sheets of paper. These methods work well but the cost to produce the machines and paper is high as well as the inflexibility. Hopefully I can provide some insight into creating an efficient and effective OMR algorithm that uses standard household scanners and a simple template.

An OMR algorithm first needs a template page to know where ROI’s are in relation to the markers. It then needs to be able to scan a page and recognize where the markers are. Then using the template, the algorithm can determine where the ROI’s are in relation to the markers. In the case of ScanTrons, the markers are the black lines on the sides and ROI’s are the bubbles that are checked.

For an effective OMR, the markers should be at least halfway across the page from each other (either vertically or horizontally). The further apart the markers are, the higher accuracy you will achieve.

For the simplicity of this tutorial, we will use two QR codes with one in each corner as the markers. This will be our template:

Opening the template in Paint, we can find the coordinate of the ROI’s and markers.
Markers:
Top right point of first QR code:
1084,76
Bottom left point of second QR code:
77,1436
Region of Interests (ROI’s)
Name box:
(223,105) -> (603,152)
Payroll # box:
(223,152)->(603, 198)
Sin box:
(223, 198)->(603,244)
Address box:
(223,244)->(603,290)
Postal box:
(223, 291)->(603,336)
Picture:
(129,491) -> (766,806)

Using the coordinate we can do some simple math to find the relative positioning of the ROI’s.

We can also find the angle of rotation from the markers. If we find the angle between the top right corner and bottom left corner of the template markers we get: 53.48222 degrees. If we find that the markers we scan have is something different from that angle, we rotate the whole page by that angle, it will fix the skewed rotation.

Scanned image:

OMR Processed Image + Fixed rotation

Extensions

Two QR Codes in each corner looks ugly but there are many other types of markers you can use.
Once you have the coordinates of the ROI’s you can easily extract them and possibly OCR the data you need.
If you want to OMR a page where you have no control over the template you need to do some heuristics to find some sort of markers on the page (for example looking for a logo or line detection).
You can easily add an extension for multiple choice or checkboxes and extract the ROI to determine the selection.
In real applications you will want to create your own template dynamically and encode the ROI data somewhere so you do not have to manually enter the coordinates of the marker and ROI’s.

Source Code

Source on Github: https://github.com/ayoungprogrammer/OMR-Example


#include <opencv2/highgui/highgui.hpp>
#include <opencv2/imgproc/imgproc.hpp>
#include <zbar.h>
#include <iostream>

using namespace cv;
using namespace std;
using namespace zbar;

//g++ main.cpp /usr/local/include/ /usr/local/lib/ -lopencv_highgui.2.4.8 -lopencv_core.2.4.8

void drawQRCodes(Mat img,Image& image){
  // extract results 
  for(Image::SymbolIterator symbol=image.symbol_begin(); symbol != image.symbol_end();++symbol) { 
    vector<Point> vp; 

    //draw QR Codes
    int n = symbol->get_location_size(); 
    for(int i=0;i<n;i++){ 
      vp.push_back(Point(symbol->get_location_x(i),symbol->get_location_y(i))); 
    } 
    RotatedRect r = minAreaRect(vp); 
    Point2f pts[4]; 
    r.points(pts); 
    //Display QR code
    for(int i=0;i<4;i++){ 
      line(img,pts[i],pts[(i+1)%4],Scalar(255,0,0),3); 
    } 
  } 
}

Rect makeRect(float x,float y,float x2,float y2){
  return Rect(Point2f(x,y),Point2f(x2,y2));
}

Point2f rotPoint(Point2f p,Point2f o,double rad){
  Point2f p1 = Point2f(p.x-o.x,p.y-o.y);

  return Point2f(p1.x * cos(rad)-p1.y*sin(rad)+o.x,p1.x*sin(rad)+p1.y*cos(rad)+o.y);
}

void drawRects(Mat& img,Point2f rtr,Point2f rbl){
  vector<Rect> rects;

  Point2f tr(1084,76);
  Point2f bl(77,1436);

  rects.push_back(makeRect(223,105,603,152));
  rects.push_back(makeRect(223,152,603,198));
  rects.push_back(makeRect(223,198,603,244));
  rects.push_back(makeRect(223,244,603,290));
  rects.push_back(makeRect(223,291,603,336));

  rects.push_back(makeRect(129,491,765,806));


  //Fix rotation angle
  double angle = atan2(tr.y-bl.y,tr.x-bl.x);
  double realAngle = atan2(rtr.y-rbl.y,rtr.x-rbl.x);

  double angleShift = -(angle-realAngle);

  //Rotate image
  Point2f rc((rtr.x+rbl.x)/2,(rbl.y+rtr.y)/2);
  Mat rotMat = getRotationMatrix2D(rc,angleShift/3.14159265359*180.0,1.0);
  warpAffine(img,img,rotMat,Size(img.cols,img.rows),INTER_CUBIC,BORDER_TRANSPARENT);

  rtr = rotPoint(rtr,rc,-angleShift);
  rbl = rotPoint(rbl,rc,-angleShift);

  //Calculate ratio between template and real image
  double realWidth = rtr.x-rbl.x;
  double realHeight = rbl.y-rtr.y;

  double width = tr.x-bl.x;
  double height = bl.y - tr.y;

  double wr = realWidth/width;
  double hr = realHeight/height;

  circle(img,rbl,3,Scalar(0,255,0),2);
  circle(img,rtr,3,Scalar(0,255,0),2);

  for(int i=0;i<rects.size();i++){
    Rect r = rects[i];
    double x1 = (r.x-tr.x)*wr+rtr.x;
    double y1 = (r.y-tr.y)*hr+rtr.y;
    double x2 = (r.x+r.width-tr.x)*wr +rtr.x;
    double y2 = (r.y+r.height-tr.y)*hr + rtr.y;
    rectangle(img,Point2f(x1,y1),Point2f(x2,y2),Scalar(0,0,255),3);
    //circle(img,Point2f(x1,y1),3,Scalar(0,0,255));
  }
}

int main(int argc, char* argv[])
{
  Mat img = imread(argv[1]);

  ImageScanner scanner; 
  scanner.set_config(ZBAR_NONE, ZBAR_CFG_ENABLE, 1); 

  namedWindow("OMR",CV_WINDOW_AUTOSIZE); //create a window

  Mat grey;
  cvtColor(img,grey,CV_BGR2GRAY);

  int width = img.cols; 
  int height = img.rows; 
  uchar *raw = (uchar *)grey.data; 
  // wrap image data 
  Image image(width, height, "Y800", raw, width * height); 
  // scan the image for barcodes 
  scanner.scan(image); 

  //Top right point
  Point2f tr(0,0);
  Point2f bl(0,0);

  // extract results 
  for(Image::SymbolIterator symbol = image.symbol_begin(); symbol != image.symbol_end();++symbol) { 
    vector<Point> vp; 

   //Find TR point
   if(tr.y==0||tr.y>symbol->get_location_y(3)){
     tr = Point(symbol->get_location_x(3),symbol->get_location_y(3));
   }

   //Find BL point
   if(bl.y==0||bl.y<symbol->get_location_y(1)){
     bl = Point(symbol->get_location_x(1),symbol->get_location_y(1));
   }
  } 

  drawQRCodes(img,image);
  drawRects(img,tr,bl);
  imwrite("omr.jpg", img); 

  return 0;
}

Hosting multiple websites on one server with Apache 2.4 (including Node) on Ubuntu 12.04

Categories Uncategorized
While I was setting up my VPS (Virtual Private Server) Ubuntu 12.04. I had a lot of difficulties with running my existing Node.js server with Apache 2.4.

I had multiple domains that I wanted to host on one server, one was a Node.js server and the other was Apache 2.4.

The solution took me a bit of some Googling and trial and error.

Go to /etc/apache2/sites-enabled/000-default.conf

To set up with node, we need to enable proxypass:

sudo a2enmod proxy
sudo a2enmod proxy-http

Edit it as such:

NameVirtualHost *

<VirtualHost *:80>
    ServerName myapachedomain.ca
    ServerAdmin webmaster@localhost
    DocumentRoot /var/www/html/mywebpage1
</VirtualHost>

<VirtualHost *:80>
    ServerName myapachesite2.com
    ServerAdmin webmaster@localhost
    DocumentRoot /var/www/html/mywebpage2
</VirtualHost>

### FOR NODE.JS SERVER
<VirtualHost *:80>
     ServerName mynodedomain.com
     ProxyPass / http://localhost:3000/
</VirtualHost>

Your node.js server should be running on localhost at port 3000

Tutorial: Setting up and Installing the MEAN stack

Categories Uncategorized

Tutorial: Setting up the MEAN stack

The MEAN stack: (MongoDB, ExpressJS, AngularJS and Node.JS) are a group of powerful technologies that allow you to write a completely functional website from back-end to front-end using only Javascript. Using only Javascript allows developers to only in one language instead of managing several different languages (such as PHP or Ruby) from front and back end. Javascript does have its own pitfalls, but it is still a powerful language is utilized correctly.
MongoDB: Open source NoSQL database
ExpressJS: Web application framework for node (serves front end)
NodeJS: Fast efficient nonblocking backend 
AngularJS: Front end for enhancing web apps

Project available on GitHub: https://github.com/ayoungprogrammer/meanTemplate

Install Eclipse IDE

For web development, I find Eclipse is very useful as it comes with a visual of the file system and can compile from the IDE. 

Install Node.JS

Download nodejs at:

Install ExpressJS

In console type:
npm install express -g
This will install express globally on your machine.
You may need to use 
sudo npm install express -g

Install Nodeclipse for using Node.js in Eclipse

Follow instructions at:

Install MongoDB

Follow download instructions at:
For MacOSX you can use homebrew to install mongoDB quickly:
brew install mongodb
Create your first Express project
In Eclipse -> File -> New -> Express Project
Type in your new project name and click finish when done.
You should have a project that looks like this:
public
     |——-   stylesheets
                        |————-styles.css
routes
      |—————index.js
      |—————user.js
view
      |—————layout.jade
      |—————index.jade
app.js
package.json
README.md
Here is an explanation of what each thing does:
public: Everything in the public folder is served to the client by expressJS
stylesheets: Commonly, this folder will contain all the .css files for a website
styles.css: This is the current CSS file for the default webpage
routes: This folder contains the routes files for which requests are directed
index.js: This file contains the routes for index
user.js: This file contains the routes for users [this can be deleted]
view: This folder contains the views of the application
layout.jade: This file is the default template of a webpage
index.jade: This file is the index webpage
app.js This is the main file that node.js runs
package.json: This file tells node the project dependencies to install
README.md: This file tells another developer what the project is
      
The project currently uses the Jade templating engine to render pages. A template engine compiles source files into html files. 

Run the app

In console type:
node app.js
In your browser, type in the url: http://localhost:3000
If you have done everything correctly, then you should see this:

Express

Welcome to Express

Install Bower

Bower is a tool for installing other libraries similar to npm.
To install, type the following into a console:
npm install bower -g 
If you have errors, you may need to use 
sudo npm install bower -g 
Create a folder called public/js
This folder is where all the javascript files will be placed for the front end
Create another folder called public/js/vendor
This folder is where all the vendor Javascript libraries will be placed. Vendor means external 3rd party libraries such as AngularJS which we will be installing.
Create a file called .bowerrc in your project directory with the following:
{ “directory” : “public/js/vendor” }
Everything that bower installs will be put into /public/js/vendor.

Install AngularJS

We use bower to install AngularJS by typing in console:
bower install angular
This should install angularjs into public/js/vendor. At the time of writing this tutorial, the version is 1.2.3.
Install Mongoose
Mongoose is the api to connect to MongoDB.
We can install it by adding a dependency in package.json:
 “dependencies”: {
    “express”: “3.4.0”,
    “jade”: “*”,
    “mongoose”: “*”
  }
and putting into console from the project directory:
npm install 
NPM will automatically look at package.json and look for dependencies to install. 

Your tools are ready!

The MEAN stack tools are all ready and installed but the project does not do anything right now.
We will build a MEAN app in the next part of the tutorial.